Saturday, 30 April 2016

How To Root Your Android Device?


How to root android
Android is a mobile operating system that based on Linux and the root user is an Administrator user, which has all permissions to access to the entire Android operating system (OS). Like other mobile OS, Android limits the app working in the sandbox, to protect your Android device from threats as well as exploitation.
On a regular Android device, you do not have root access, but the root user always exists in the system. You can not access to the root user with any built-in feature, so “rooting” is an only way to access and use the root user account.

Basically, rooting an Android device is the same with jailbreak an iOS device, allows apps to work with more access, permissions and low-level system. With the root user access, you can run a firewall on your Android device, as well as remove bloatware, enable tethering internet, manually backup app settings and use a lot of tweaks. If you want to use a specific Android app and it’s required root access, then you need to root your Android device.

What You Should To Know Before Root Your Android Device?

Typically, Google and manufacturers do not recommend you to root Android devices because it makes your Android OS is more weak. After rooted, most apps are able to working out of the sandbox and could abuse root privileges and snoop on other Android apps. For example, if you are using Google Wallet, someone can try to attack your Android devices and exploit your Google Wallet account.
In terms of some manufacturers, you will lose warranty of the device if it’s rooted. The root process is not actually damaging the hardware. You are also able to unroot the device by just restore the stock firmware, and manufacturers will not able to know if it’s been rooted or not.
Basically, rooting is a safe process, but if you mess something up, then you can’t expect a free fix from warranty service. So make sure you clearly know what you will do in the next step or know how to restore your Android device in case it got errors. I would suggest you backup your data and important files before root your Android device. If you don’t know how to backup the device, then the simplest way is using Android file transfer to copy your important data and files.

How To Root Android Device?

Rooting is a simple and quick process, but there is no standard way to root all devices. I will list a few popular tools that will help you root your Android device quickly and safety. If your Android device is not supported, visit XDA Developers forums, find your device on the sub-forum with your specific model for solutions.

Kingo Root

kingoroot
This is one of the most popular rooting tools that supports a larger number of Android devices. You can take a look at the supported list to see if your device is supported or not. The website also claimed this is an incomplete list, there are a lot of “not listed” devices, but it’s not meant “not supported”.
Kingo Root is a Windows app, and you need to download the app to your Windows computer, enable USB debugging, connect your Android device to the computer, and then the Kingo Root will automatically try to root the device. It’s also available as an Android app, you need to download the .apk file, install the app as external app and use it to root your device. If you want to install and use apps from “unknown sources”, visit Settings > Security, and then “Enable apps from Unknown sources”.

Towelroot

towelroot
Towelroot is another app that runs on Android OS, allows you to root your Android device with a few simple steps. The Towelroot app was developed by GeoHot, you can visit the website address at here, download the .apk file, install the Towelroot app and use it to root your device.
I would suggest you to install the SuperSU app from Google Play, this app will let you control which app will have access to root user as it will ask you and give you an option to grant the access or deny it. This is a simple way to control the app permissions and deny unwanted access.

How to Unroot A Rooted Android Device?

As I have mentioned above, the SuperSU app will help you to control the app permissions and accesses. However, it also has a great feature, allow you to do full unroot a rooted device. Go to Settings and select Full Unroot option and your Android device is definitely fully restored.

Wednesday, 27 April 2016

Facebook popup with twitter follow button & Email Subscription form!

popup like box
Do you want to make more twitter followers, facebook likes & Email Subscribers? Then don't worry you don't need to install any popup windows and floating widget to your blog to get likes and flowers, here is a simple popup box which allows visitors to like with three option Email Subscription, Facebook like button & Twitter follower button in only one popup box.

This popup widget was created with jquery & css, there is no close button and not timer. If any visitor want to close this popup just press ESC button on Keyboard or click anywhere on the page.


The jquery call the popup when the page is load and it is very fast and quick, we have share a previous Facebook Popup like box, but there is only one option that is only facebook like button installed in that popup but now in this Simple popup box you will find three options that are Email Subscription form, Facebook like button & twitter follower button. The popup is easy to install to any blogger blog template no need to go to template, just copy and paste the code in html element.


Installation Popup To Blogger

  • Go to Layout
  • Add Element > Html/Javascript
  • Paste the code and save it

Popup Subscription Box Code


<!-- ########## SUBSCRIPTION BOX STARTS ########## -->
<script src='http://ajax.googleapis.com/ajax/libs/jquery/1.5/jquery.min.js'></script>
<script src="https://sites.google.com/site/mmktricks/Subscription-cbox.js"></script>
<!-- POPUP LIKE BOX -->
<style>
    #colorbox, #cboxOverlay, #cboxWrapper{position:absolute; top:0; left:0; z-index:9999; overflow:hidden;}
    #cboxOverlay{position:fixed; width:100%; height:100%;}
    #cboxMiddleLeft, #cboxBottomLeft{clear:left;}
    #cboxContent{position:relative;}
    #cboxLoadedContent{overflow:auto;}
    #cboxTitle{margin:0;}
    #cboxLoadingOverlay, #cboxLoadingGraphic{position:absolute; top:0; left:0; width:100%;}
    #cboxPrevious, #cboxNext, #cboxClose, #cboxSlideshow{cursor:pointer;}
    .cboxPhoto{float:left; margin:auto; border:0; display:block;}
    .cboxIframe{width:100%; height:100%; display:block; border:0;}
    #cboxOverlay{background:#000;opacity:0.5 !important;}
    #colorbox{}
         

#cboxLoadingOverlay{background:#fff;}
         

#cboxLoadingGraphic{background:#fff;}
           #cboxTitle{position:absolute; bottom:-25px; left:0; text-align:center; width:100%;  font-weight:bold; color:#7C7C7C;}
           #cboxCurrent{position:absolute; bottom:-25px; left:58px; font-weight:bold; color:#7C7C7C;}
           #cboxPrevious, #cboxNext, #cboxClose, #cboxSlideshow{position:absolute; bottom:-29px;

background:#fff; width:23px; height:23px; text-indent:-9999px;}
           #cboxPrevious{left:0px; background-position: -51px -25px;}
           #cboxPrevious.hover{background-position:-51px 0px;}
           #cboxNext{left:27px; background-position:-75px -25px;}
           #cboxNext.hover{background-position:-75px 0px;}
           #cboxClose{right:0; background-position:-100px -25px;}
           #cboxClose.hover{background-position:-100px 0px;}
           .cboxSlideshow_on #cboxSlideshow{background-position:-125px 0px; right:27px;}
           .cboxSlideshow_on #cboxSlideshow.hover{background-position:-150px 0px;}
           .cboxSlideshow_off #cboxSlideshow{background-position:-150px -25px; right:27px;}
           .cboxSlideshow_off #cboxSlideshow.hover{background-position:-125px 0px;}
    /*-----------------------------------------------------------------------------------*/
    /*   sUBCRIPTION POPUP LIKEBOX FOR BLOGGER BY WWW.MMKTRICKS.BLOGSPOT.COM
    /*-----------------------------------------------------------------------------------*/
    #mmk-subfb {
        font: 12px/1.2 Arial,Helvetica,san-serif; color:#666;
width:540px;
height:210px;
box-shadow: inset 0px 0px 0px #404040;
-webkit-box-shadow: inset 0px 0px 0px 0px #cccccc;
-moz-box-shadow: inset 0px 0px 0px #cccccc;
-webkit-border-radius: 20px;
-moz-border-radius: 20px;
border-radius: 20px;
    }
    #mmk-subfb a,
    #mmk-subfb a:hover,
    #mmk-subfb a:visited {
        text-decoration:none;
    }
    .mdbox-title {
background:#000;
       color: #fff;

       font-size: 20px !important;
       font-weight: bold;
       margin: 10px 0;
    border:20px solid #ddd;
    -moz-border-radius:6px;
    -webkit-border-radius:6px;
    border-radius:6px;
    box-shadow: 5px 5px 5px #CCCCCC;
    padding:10px;
    line-height:25px; font-family:arial !important;
    }
    .mdbox-tagline {
       color: #999;
       margin: 0;
       text-align: center;
    }
    #mdsubs-container {
        padding: 35px 0 30px 0;
        position: relative;
    }
    a:link, a:visited {
    border:none;
    }
    .demo {
    display:none;
    }

.mmk-subemail{
background:urlundefinedhttps://blogger.googleusercontent.com/img/b/R29vZ2xl/AVvXsEihFjsx7qv-nR-H1Khedgb89PCe6mHjlzXirgNFyHuXYG9L5L_seYDZxkdzXvKCwbYjl8HWaX9orUORdshkeYPNut_TWkrhKq2Rzxnb0IhLVx52c4H1XFaj9e6-2KS1B36JEPfixWDf_ELQ/s1600/email.png) no-repeat 0px 12px ;
width:300px;
padding:10px 0 0 55px;
float:center;
font-size:1.4em;
font-weight:bold;
margin:0 0 10px 0;
color:#686B6C;
}
.mmk-subemailsubmit{
background:#9B9895;
cursor:pointer;
color:#fff;
border:none;
padding:3px;
text-shadow:0 -1px 1px rgbaundefined0,0,0,0.25);
-moz-border-radius:6px;
-webkit-border-radius:6px;
border-radius:6px;
font:12px sans-serif;
}
.mmk-subemailsubmit:hover{
background:#E98313;
}
.textarea{
padding:2px;
margin:6px 2px 6px 2px;
background:#f9f9f9;
border:1px solid #ccc;
resize:none;
box-shadow:inset 1px 1px 1px rgbaundefined0,0,0,0.1);
-moz-box-shadow:inset 1px 1px 1px rgbaundefined0,0,0,0.1);
-webkit-box-shadow:inset 1px 1px 1px rgbaundefined0,0,0,0.1); font-size:13px;
width:170px;
color:#666;}
</style>


<script type="text/javascript">
jQueryundefineddocument).readyundefinedfunctionundefined){
if undefineddocument.cookie.indexOfundefined'visited=flase') == -1) {
var fifteenDays = 1000*60*60*24*30;
var expires = new Dateundefinedundefinednew Dateundefined)).valueOfundefined) + fifteenDays);
document.cookie = "visited=true;expires=" + expires.toUTCStringundefined);
$.colorboxundefined{width:"600px", inline:true, href:"#mmk-subfb"});
}
});
</script>
<div style='display:none'>
<div id='mmk-subfb' style='padding:10px; background:#f9f9f9;'>
<center>
<b>Get Latest Updates Straight in your Inbox
    <br/>by submitting your Email ID below.</b>
<div class="mmk-subemail">
Subscribe via Email
<form action="http://feedburner.google.com/fb/a/mailverify" id="feedform" method="post" target="popupwindow" onsubmit="window.open undefined'http://feedburner.google.com/fb/a/mailverify?uri=qlgrr', 'popupwindow', 'scrollbars=yes,width=550,height=520');return true">
<input gtbfieldid="3" class="textarea" name="email" onblur="if undefinedthis.value == &quot;&quot;) {this.value = &quot;Enter email address here&quot;;}" onfocus="if undefinedthis.value == &quot;Enter email address here&quot;) {this.value = &quot;&quot;;}" value="Enter email address here" type="text" />
<input type="hidden" value="Blogspot/qlGrR" name="uri"/><input type="hidden" name="loc" value="en_US"/>
<input class="mmk-subemailsubmit" value="Submit" type="submit" />
</form>
</div><div style='clear:both'></div>
<div align="center">
<div style="border-bottom:1px solid #e6e6e6; margin:8px 5px 0px 0px; padding-bottom:5px;"></div>
<div style='margin:5px 0px 50px 0px; padding:10px; float:none; width:470px;'>
<div style='margin:0px 0px 0px 0px; padding:0px; float:left; width:252px; border-right:1px solid #ddd;'>
<iframe allowTransparency='true' frameborder='0' scrolling='no' src='http://www.facebook.com/plugins/likebox.php?href=http%3A%2F%2Fwww.facebook.com%2Fpages%2FMy-Blogger-Trick%2F215750558457824&width=292&colorscheme=light&show_faces=false&border_color&stream=false&header=false&height=62' style='border:none; overflow:hidden; width:292px; height:62px;'></iframe>
</div>
<div style='margin:10px 30px 0px 0px; padding:0px; float:right; width:150px;'>
<a class='twitter-follow-button' data-button='grey' data-link-color='#289728' href='http://twitter.com/mybloggertrick' rel='nofollow'></a>
<script src='http://platform.twitter.com/widgets.js' type='text/javascript'></script>
</div></div>
<a style="padding:13px 5px 0px 5px; color:#A7A7A7; font-family:arial; font-size:10px; text-decoration:none; float:right;"  target="_blank"href="http://www.mmktricks.blogspot.com/2013/04/facebook-popup-with-twitter-follow.html" target="_blank" rel="dofollow">Get This</a>
</div></div>
  <div style='clear:both'></div>
</center>
</div></div>
<style>#cboxClose{display:none;}</style>
<!-- ########## SUBSCRIPTION BOX END ########## -->

Customization


To change width of this popup Replace this width:540px;
To change Background Replace this #f9f9f9 try our Html Color Generator

Email Subscription 


Replace (http://feedburner.google.com/fb/a/mailverify?uri=qlgrr) with your feedburner link
Replace Blogspot/qlGrR with your feedburner code.

Facebook Like Button


Replace (http%3A%2F%2Fwww.facebook.com%2Fpages%2FMy-Blogger-Trick%2F215750558457824)with your facebook like button link. this link you can find in facebook like box.

CrownIt App – Get Cashback on all Online & Offline Spends


There are loads of Android apps which give Cashback on online purchases, but very few when it comes to getting good discounts and cashbacks when it comes to local deals. But not anymore, CrownIt is an awesome app which will get your Cashback on swiping your hotel bills, cafes, spa bills and even pharmacy bills!. This makes spending a bit sweeter after all your desert after a meal becomes free due to the cashback!
Steps to Earn Cashback from CrownIt App –
  • First of all , Download & Sign-up on CrownIt app from the link below –
    Click here to Download CrownIt App from Google Play or Apple iTunes Store.
  • After the app has been downloaded, Open the app, now the app will automatically search the nearby stores according to the category selected as shown in the image below –
    Restaurants in CrownIt App
    Now after tapping on the restaurant/cafe name, it will open the restaurant menu.
  • Now simply tap on “Tap to Open wheel” option as shown in the image below , it will help us to determine the cashback rate for the cafe as shown in the image below –
    Tap to Open Wheel
    Now, after opening the wheel Tap it again to “Tap to Spin it” as shown below –
    Tap to Spin
  • Now the wheel will spin, itself and the cashback rate will be shown. Now simply scan your Restaurant bill within 3-6 hours from the spin, and bill generation to get your desired cashback in your CrownIt wallet!
  • Very Simple, isn’t it?
  • Click here to Download Crown It app from Store.


Crown It app Redemption Process
Where can I redeem my CrownIt Credits ?
  • Well, Now getting CrownIt coins was an easy-task but we might want to redeem our earned cashback too.. , Steps to redeem your CrownIt cashback too is very simple.
  • There are loads of options such as Mobile Recharge and even online shopping vouchers for stores such as Flipkart, Amazon, Paytm and even Pizza Hut & Dominos! .
  • Thus, makes even more sense as you can earn yourself a free treat just for snapping small bills in restaurants as shown in the alongside image.
Do let us know your views on Crown It app in comments, also do let us know if you face any problems while using the app.

Google Indexes Only 26 Pages of Blogger Sitemap why?

sitemap submission

This post marks part of our new series on "Blogger SEO PACK 2012". Due to integration of Yahoo's algorithm at Bing webmaster tools, sitemap submission has become much easy and valuable now. Previously we only need to submit links to Yahoo site explorer and would need to just Ping MSN search engine,
and you had no advance webmaster settings page where you could monitor your progress report but now things have pretty much changed. Just like Google webmaster account where you submit your blog or website sitemaps, you will follow an exact similar approach at Bing and yahoo. This part would discuss the reasons on why only the latest 26 pages of your blog are indexed upon sitemap submission at Google but not your entire post pages. We will also offer a solution to this. Lets kick start Part-1 of Blogger SEO PACK for 2012.

Purpose of This Series:

This series is the only thing you will need while starting new blogs. It will include every single SEO detail required to set your blogs go viral. From sitemap submission to crawling errors, you will find solution for all your problems. I personally apply this technique for my blog and blogs of my clients. I will share how to add noindex and nofollow link elements to categories and archives correctly because a lot of miss-information is hovering in blogosphere related to these terms. I am sure this series will play an important role in making SEO no less than a fun.

Why Does Google Indexes Limited Pages?

When you submit your sitemap at Google webmaster account, you might have observed that only 26 URLs are shown to be indexed and not the remaining URLs on your blog. If you have more than 26 posts on your blog then Google wont be able to index the older posts correctly. Though Google crawlers are becoming efficient day by day with auto detection of webpages but still your posts can go neglected due to growing numbers of pages uploaded daily.
This problem is related to blogspot blogs alone. Blogger though free but is highly un-optimized platform in comparison to wordpress. Google uses Atom feed in xml formats to store a backup of your posts instead of the rich RSS feed format. The sitemap is generated automatically whenever you create a new blog at blogger and displays a list of only first 26 pages of your blog. This can effect your crawl rate and traffic because not all your pages are indexed. Therefore to let Google access every single page of your blog we will need to submit multiple sitemaps. The procedure is really simple as discussed below:

Multiple Sitemap Generation For blogger

We will break the entire blog posts into small segments comprising of 500 posts each. Its better to submit 500 posts per sitemap for better indexing. To generate sitemaps for your blog follow these steps:
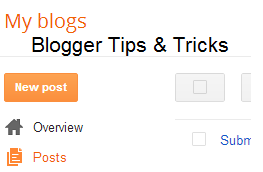
  1. Go and check your blogger dashboard to see how many posts have you written so far.
create post


     2.    Count total number posts. The count is visible just below your blog title on your dashboard.
      3.   If your total post count is less than 500 then you must submit the following sitemap:
For Blogs with posts less than 500
atom.xml?redirect=false&start-index=1&max-results=500
             If your post count is more than 500 but less than 1000 then submit the following two sitemaps instead:
For Blogs with posts less than 1000
atom.xml?redirect=false&start-index=1&max-results=500
atom.xml?redirect=false&start-index=501&max-results=500
For Blogs with posts less than 1500
Similarly if your post count is greater than 1000 but less than 1500 then you will submit the following sitemaps and so on...
atom.xml?redirect=false&start-index=1&max-results=500
atom.xml?redirect=false&start-index=501&max-results=500
atom.xml?redirect=false&start-index=1001&max-results=500
You have now successfully generated or created the sitemaps. Lets know submit them to Google.

Submit Sitemaps You Just Generated

  1. Go To Google Webmasters
  2. You will see list of all blogs that you created at blogger. Choose your main blog
  3. You are now on the Dashboard page where you can see reports related to crawl errors, search queries and sitemaps.
  4. Click the More » Link just under the sitemaps report.
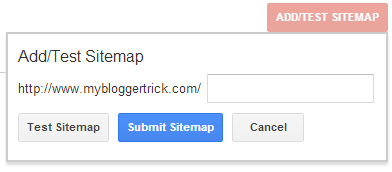
  5. Towards top right side, click the ADD/TEST SITEMAP button
  6. In the empty blank paste your first sitemap and then click "Submit Sitemap". Repeat this step for remaining sitemaps until you have finished submitting all the sitemaps that you generated.
add site map


      7.   Now Google will take at most three days to crawl and index every single page of your blog. After 1-3 days you will find that all URLS that you submitted are successfully indexed. Following is the report for Blogger Tips & Tricks.


indexed pages

As you can see in the screenshot above that I have submitted three sitemaps instead of two. The last one which contains 26 URLs is an optional one because we already contained our first 26 URLs under the 500 limit. Since the total number of my posts plus pages are 614 therefore I submitted the following two sitemaps accordingly
atom.xml?redirect=false&start-index=1&max-results=500
atom.xml?redirect=false&start-index=501&max-results=500

Need help?

You have now learned how to generate multiple sitemaps and submit them correctly. Our coming parts will be even more specific. If you are encountering any problem just let me know so that I could help. Stay tuned for upcoming parts. Peace and blessings pals! :)

Tuesday, 26 April 2016

How to identify "SEO" Over Optimized blog or website ?

If you were anywhere near this blog or other blogs about SEO and stuff these past few days, then you'll know what the fuss is all about with Google's updates. Google has been pretty active lately, what with the Penguin and Panda and 50 other minor updates. In essence, it has been going to great lengths to return good quality search results to users. Google is coming down, and coming down hard on "spam" websites that are over-optimized with respect to SEO. We've been hearing a lot about this "over-optimized" thing. So what exactly is SEO over-optimization? And how do you know when your site, or some other site is over-optimized?

Now SEO over-optimization is not a good thing. If you are using such tactics, then stop immediately! I know some sites have found loopholes in Google's algorithms, and are exploiting them with over-optimization, but that doesn't mean you have to do the same. Who knows when the noose will tighten? Search Engine (over-) Optimizers might be winning battles and skirmishes, but it's a war they cannot win.

Head of Google's web-spam team, Matt Cutts, said in March that Google has been working on penalizing overly optimized sites for the past few months. He explained that with this, Google plans to level the battlefield so that no one has an advantage, and the top rankings are determined by brute strength, i.e. good content, rather than cunning tricks (black hat SEO). This way, sites with little SEO but good content will come up, while sites with extra SEO but poor content will go down. So let's now talk about what things entail over-optimization, and how you can detect or avoid it.

What an over optimization penalty entails?

Despite clear statements from Google such as "crackdown on black hat SEO", the idea as to what actually incurs Google's displeasure is still vague. Google doesn't let people in on the secrets. As they said;
While we can’t divulge specific signals because we don’t want to give people a way to game our search results and worsen the experience for users, our advice for webmasters is to focus on creating high quality sites that create a good user experience and employ white hat SEO methods instead of engaging in aggressive webspam tactics
But gathering facts from the messages and notices Google has been putting out, we can get a general idea as to what things we should avoid. Here are some over optimization practices that you need to stay away from.

Bad inbound links

Recently, Google started giving out lots of warning messages to webmasters through the Webmaster tool, informing them about some bad linking structures with their sites. Here at Blogger Tips & Tricks, we always discourage buying backlinks. These are bad, automated links. So take a look at what sort of links you have. Start using Google Webmaster Tool to get notified.

Another fairly common practice is making inbound links from other websites one might own. Usually, people create multiple sites to supplement their main site. These sites, of course are low quality. Some people might even employ automated mechanisms to make these side-websites look genuine. So if you have links coming to your website from other sites you own, then this practice falls into the category of over-optimization.

Link anchor text is also very important. Anchor text is the text that displays instead of the actual link. For example, Google is the anchor text for the link www.google.com. Now if many of your inbound links have the same anchor text, then it hints at automation. This usually happens when you buy backlinks, which is why you should never do that.

Cloaking and hidden text

Now you might not be aware about you backlinks, but you sure as hell know what you are doing when you hide or cloak some content. This is a ruthless black hat SEO technique. Cloaking means hiding some content from the search engine, or displaying a version of some text to the search engine that is different from the one presented to the user. This is usually used in over-promotion, phishing, etc.

Hidden text is text that is made invisible to the readers so that they can't see what they're clicking on. This trick can be achieved by playing around with colors. For example, white text won't show against a white background. These techniques are unethical, and cheap. And you should never use them.

High keyword density

Using too many keywords in your titles, meta descriptions, intro paragraphs etc is considered as over-optimization, since putting up more keywords is a desperate attempt at gaining a search engine's attention. Google has started penalizing sites that have a high keyword density. Usually, anything above 2-3% density is high.

Excessive interlinking

Interlinking content within your site is a great SEO practice. We always recommend people to interlink more often. But there's a catch. In an attempt for over-optimization, some webmasters interlink so much that there are more than a couple links in any given post pointing at the same page. And to make matters worse, they might even link repeatedly to their home pages. Well that, my friends, is a recipe for disaster.

Improper heading structure

H1 tags are a lot more appealing to search engines than other tags. So some people use multiple h1 tags to gain attention. Well that is just plain wrong. Always use one, and only one h1 tag per page. Use h2 and h3 tags for headings and subheadings.

Too many redirects

Now if you have changed the file name for a page, then redirects are okay. But redirecting just for the sake of gaining ad income or directing you to affiliate pages is just sad. Too many redirects, and Google will catch you spamming.

Duplicate content

It often happens that those who are unable to write good quality content, they resort to these over optimization tactics. And since they don't have much content to write about, they re-use their content a lot. While quotes and stuff are okay, but copying paras from old posts and rephrasing them is wrong.

Pop-ups

You know someone's desperate when you see pop-up ads on their websites. While pop-ups themselves are bad, some webmasters make it even worse. They deceive users by designing an exit 'cross' button where a cross would normally be. And when someone wants to close the ad, they click this button, which is actually a link to an ad or something. While this ensures a high click-through rate, it is highly unethical, and must never be used.

Well, here were the basic over-optimization tactics that you should avoid. If you are using them, then I'd advice you to let go of them. If you've been hit by Google as a result of these tactics, you can always read other posts in this series to get a better idea. Good luck with your Panda and Penguin recovery :)

How to install or add a Favicon in a blog or website : Full Tutorial

How to install or add a Favicon in a blog or website : Full Tutorial
A favicon (short for favorites icon), also known as a website icon, shortcut icon, url icon, or bookmark icon is a 16x16 pixel square icon associated with a particular website, blog or webpage. Some of my friends asked about installing or adding a favicon to their blogs and stuff related to it. I have


tried to include every point related to favicon in this post. So here it is ..

What is a Favicon ?

As I have already mentioned the definition but still the following pictures will make it more clear.

How to install or add a Favicon in a blog or website : Full Tutorial

The icons marked in the screenshot above are known as Favicon. The image shows favicon of Blogger. These favicon are shown inside the address bar and on the tabbar whenever a site is shown in the browser.


How to create a favicon for your blog or website ?

There are two ways to create a favicon either you can convert an already existing image to a favicon or you can create a favicon directly.

If you want to create a favicon directly you can use Favicon.cc , it allows you to design a favicon using your imagination. It also allows animation to be included into your favicon.

If you want to create a favicon using a pre existing image, you can use these images to icon services , to create a 16 x 16 icon file which can be used as a favicon.


How to install or add a Favicon(16x16 icon) in a blog or website ?

Now that you have created your favicon, you have to install it in your blog or website. To install or add a favicon you have to include a code in the your blog or website. Before installing the code you should upload the 16 x 16 favicon that you already created. You can use these services to upload your favicon for free. Upload the favicon.

After uploading, copy the URL of the icon file you have uploaded and paste it somewhere, it will be used further in the process.

Copy the following code and paste it between <head> and </head> tags.

<link href='YOUR-ICON-URL' rel='shortcut icon'/>

NOTE: Don't forget to replace the YOUR-ICON-URL with the URL of uploaded icon file. Thats all you have installed a favicon in your blog or website.

Monday, 25 April 2016

Top 6 Tips to Optimizing Blog for Google Image Search


Google image SEO strategies are important apart of overall SEO activities. Couple of months back Google added the particular +1 button for the image listings. From this proceed Google caused it to be clear that will Google impression search additionally part of Google’s wonderful social media.
Check your Google+ user profile +1 tab and locate the images you’ve got already contributed using the +1.

This will be relevant in terms of your SEO practices. The images need to be ranked enough to get enough +1s so that you will get more traffic through image Google listing. Analyze your current image’s SERP rank of course, if you find they are nowhere inside the first few internet pages, then it is time for you to focus on enhancing images pertaining to search engines.

1) Use appropriate SEO helpful image caption

What is a correct image title? If you brand an image since “pic00.jpg” or “smallimage.png” then a name is regarded as improper with regards to SEO. Ensure that the image identify includes one or more keyword. Nevertheless never unnecessarily use them. If you have a picture of a white-colored bird which has a red beak after that name the look as “white-bird-with-a-red-beak.jpg” instead of “white-bird.jpg“.

2) Use Picture ALT along with TITLE characteristics

The Search engine optimization significance regarding image alt value is actually neglected by a lot of. Using the Alt attribute valuation on the image is essential. As we described many times in various articles, engines like Google rarely see the content in the image, however consider the alt attribute worth to list the image. More like image title use suitable value for that alt attribute. You need to make certain that it is quick but illustrative and contains a minimum of one keyword.
Remember that based on Google “Filling alt attributes together with keywords (“keyword stuffing”) generates a negative consumer experience, and may lead to your site to become perceived as unsolicited mail.”
The identify tag isn’t that useful in relation to its image SEO. But it is a good choice for your readers. The idea normally sounds like the tooltip text message on mouse cursor over.

3) Employ Image Caption to explain your graphic

Image caption though not coupled to the <img> tag , technology-not only to provide a correct short information of the picture. It functions as a content which usually search engines would use while listing.

4) Use Graphic Sitemap

Google’s image plug-ins for Sitemaps to offer Google more details about the pictures on your site’s Web addresses
It is better to employ a separate Sitemap to read images as opposed to including these people as part of your active sitemaps.

5)Use good quality images as well as specify Picture height and also width

Use quality graphic on your web sites. But be sure that the images are usually optimized along with the size of the picture is much less. Google picture search results show images because thumbnails. Therefore images together with better quality will show up better searching results. It usually is better to stipulate the height and also width features of the image factor.

6) Use the identical image over your websites

This is a mix linking task. Like the common SEO action create hyperlinks to your images from a number of sources. Attempt to get top quality backlinks to your images by creating useful, intriguing, notable and high quality images.

How To Get More Traffic from Google Image Search?

Search engines have a great impact on creating huge traffic on your personal or professional blog site. You will never be able successful if Search engines like Google Bing Yahoo do not show your website at their platform. So we follow a variety of techniques to display our websites in search engines.
We search images from Google and find new sites from Google image search. Its a very cool tip to get visitors from Google image search.

1. Using ALT image tag


Suppose you upload a image to Picasa of blogger you will get a image HTML code just like this

<img src="https://blogger.googleusercontent.com/img/b/R29vZ2xl/AVvXsEjMPmmDD58rgOpzD1NmSMyxIMhuRL0zo_x4ainOUlXgmkQ20VarEhGjgHg4YGbU8_0s5NyexLLBnXFG1TOho-QXpuZEfmD67aUUoP_MPMtEzYtRGjp_CzAbRvxTfVylNOCwsHnnrra-PuHA/s320/seo-process6.jpg" />

Now you have to add alt tag.Just take a look below of red colored text

<img src="https://blogger.googleusercontent.com/img/b/R29vZ2xl/AVvXsEjMPmmDD58rgOpzD1NmSMyxIMhuRL0zo_x4ainOUlXgmkQ20VarEhGjgHg4YGbU8_0s5NyexLLBnXFG1TOho-QXpuZEfmD67aUUoP_MPMtEzYtRGjp_CzAbRvxTfVylNOCwsHnnrra-PuHA/s320/seo-process6.jpg" alt="Your images description"/>

I think you already get how to add alt tag in images.So your images can be seen in search engines

2. Adding A Small Javascript Code


Go to Blogger > Design > Edit Html
Now tick on the Expand Widget Template and search for the following code using CTRL+F


</head>

Now Paste the following code just before it

<script language='Javascript'>if(parent.location != self.location){parent.location=self.location;}</script>

Save your template. Now your Blogger template is more SEO friendly.

The Future of Search on Google!

google search
There’s a very interesting post on the official Google Blog today talking about the future of search and how Google is approaching it. It starts with Larry Page’s definition of the perfect search engine: “one that understands exactly what you mean and gives you exactly what you want.” It pretty much sums it up huh?
Here’s a quote from the article:

Understanding the world


In May we launched the Knowledge Graph, our database of more than 500 million real-world people, places and things with 3.5 billion attributes and connections among them. The feedback has been phenomenally positive and we want to extend this feature to people outside the U.S. So starting today, you’ll see Knowledge Graph results across every English-speaking country in the world. If you’re in Australia and search for [chiefs], you’ll get the rugby team—its players, results and history.
We’ll also use this intelligence to help you find the right result more quickly when your search may have different meanings. For example, if you search for [rio], you might be interested in the Brazilian city, the recent animated movie or the casino in Vegas. Thanks to the Knowledge Graph, we can now give you these different suggestions of real-world entities in the search box as you type.
Here’s the link to the full article: Building the search engine of the future, one baby step at a time. Make sure to read it, as understanding how things might evolve in the search space might help you with your professional projects.

Windows 8 OS Shortcut Keys..!


Windows 8 has a new user experience that is primarily touch-based. But it still has many shortcut keys to make our lives easier. These Shortcut keys are very similar to those of Windows 7.


Start Screen


Win+PgUpMove tiles to the left
Win+PgDnMove tiles to the right
Win+[Arrows]Change which tile is selected
Win+EnterOpen the selected tile
Win+COpen simplified Start menu
Win+OLock device orientation (landscape/portrait); for devices with a gyroscope
Win+SpaceSwitch input language and keyboard layout

Window and Charm Management


Win+.Move the application split to the left
Win+Shift.Move the application split to the right
Win+ZOpen the App bar
Win+Shift+COpen the Charms bar
Win+KOpen the Connect charm
Win+HOpen the Share charm
Win+IOpen the Settings charm
Win+QApplication search
Win+WSettings search
Win+FFile search
Win+YPeek at the desktop
Win+VCycle through toasts
Win+ShiftVCycle in reverse through toasts
Win+EnterOpen Narrator

Taskbar Modifiers (Classic Desktop Mode)


Shift+ClickOpen a new instance of the program
Ctrl+ClickCycle between windows in a group
Middle ClickOpen a new instance of the program
Ctrl+Shift+ClickOpen a new instance of the program as Administrator
Shift+Right-ClickShow window menu

Managing Windows (Classic Desktop Mode)


Alt+F4Close the active window
Alt+TabSwitch to previous active window
Alt+EscCycle through all open windows
Win+TabFlip 3D
Ctrl+Win+TabPersistent Flip 3D
Win+TCycle through applications on taskbar (showing its live preview)
Win+MMinimize all open windows
Win+Shift+MUndo all window minimization
Win+DToggle showing the desktop
Win+Maximize the current window
Win+If the current window is maximized, restore it; if the current window is restored, minimize it
Win+Dock the current window to the left half of the screen
*If it is already docked left, it is moved to the right half of the screen
*If it is already docked right, it is restored to its original size
Win+Dock the current window to the right half of the screen
*If it is already docked right, it is moved to the left half of the screen
*If it is already docked left, it is restored to its original size
Win+Shift+Move current window to the left monitor (with dual monitors)
Win+Shift+Move current window to the right monitor (with dual monitors)
Win+HomeMinimize all but the current window
Win+YPeek at the desktop
Win+[Plus sign]Zoom in
Win+[Minus sign]Zoom out

Starting Programs (Classic Desktop Mode)


Win+POpen the projection menu (generally used for laptops connected to projectors)
Win+1Open the first program on your Quick Launch bar
Win+2Open the second program on your Quick Launch bar
Win+nOpen the nth program on your Quick Launch bar
Win+UOpen the ease of access center
Win+FOpen the search window
Win+XOpen the Mobility Center
Win+EOpen Explorer
Win+ROpen the Run window
Win+BMove focus to notification tray (the right-most portion of the taskbar)
Win+POpen the projection menu (generally used for laptops connected to projectors)
Win+PauseOpen the System Properties portion from the Control Panel
Ctrl+Shift+EscOpen Windows Task Manager

Viewing Folders With Explorer (Classic Desktop Mode)


Alt+PShow/hide the preview pane
Alt+Go back
Alt+Go forward
Alt+Go up a directory
Alt+DMove focus to address bar
Alt+D, TabMove focus to search bar
Alt+EnterOpen the Properties window of the current selection
Ctrl+MousewheelChange the view type (extra large, small, list view, detail, etc.)
Alt+PShow/hide the preview pane

Sunday, 24 April 2016

How to Optimize comment, Label & Archive Links in Blogger?

blogger links
This is the last part of our series on Blogger SEO PACK 2012 series and it will help to remove great misconceptions and wrong seo concepts that are unfortunately spreading like fire everywhere. As Google, Bing and Yahoo continues to make search experience more trustworthy and neat and clean by removing all spammy and non-trusty sites, SEO has become the most famous name for webmasters.

Since blogging is mostly about publishing fresh links to these search engines therefore it is important that you must equip your links with proper rel link attributes. Blogger is pretty different when it comes to labels. In wordpress we have categories and then sub categories that are called tags. Tags were introduced in wordpress so that pages could be provided a much deep navigation. However we don't have sub categories in blogger, what we have are called Labels. These labels in SEO terms can be called simply Tags. You attach tags to your posts to categorize posts. Don't confuse your selves with categories, labels and tags, they are all considered the same by search engines and can be described as category links.

How important are links?

Search engine optimization revolves around optimizing mainly links. Your SERP ranking which is your ranking search engine results Page is depends largely on your meta tags, incoming and outgoing links. Links are hyperlinks that takes visitor from one page to another or from one section of your blog to another. Search Engine automatic programs called crawlers or spiders give great importance to links in any page. Your Page Rank juice flows in and out depending on how well are you linking. If you are linking to poor, low quality sites then on next PageRank update is that your PageRank would badly suffer. PageRank is responsible for telling Google how important your blog is and how faster it should be crawled and given importance. Your PageRank surely improves when others link-back(recommend) to you but you can loose the same PageRank by linking to low quality sites or sites that does not belong to your niche (blog topic).
To understand which sites you should link and which to avoid, please read:
  • When should you Tag external links as nofollow?
  • Nofollow links like DEMO, Download and Iframe Pages
But what about internal links? Can links on your blog effect your Blog indexing and Search ranking? Of Course!
All pages inside your blog are treated as separate web pages when it comes to PageRank juice flow. Archives like labels and comment links can badly produce crawl errors and makes the job difficult for search spiders to crawl your blog content/data. To make spider job easy you must act like a Traffic police by directing crawlers what to index, crawl and flow PR juice to. This is our aim of this tutorial and we will be turning your free blogger blogs into highly optimized webpages. But first lets learn some basics and wrong concepts shared widely these days.

Some Correct and Wrong SEO Concepts

I would personally except the fact that during my early stage of blogging, I personally shared some wrong SEO concepts and I used to learn them online from other fellow bloggers, but after becoming a certified SEO, most of my concepts related to how search engines work are now pretty clear. The information shared today is a result of thorough research and study, so you can confidently apply this tutorial to all your current blogs. Lets first discuss how links are structured and then share some wrong ways of optimizing them.
<a href="http://xyz.com" >Link Text</a>
This is a naked link with no link attributes. To optimize this link in order to tell search engines how much value should be given to the link you shared, most webmasters are using pretty strange ways.
Correct Concepts
These are rel link attributes that are validated by w3 (World Wide Web Consortium (W3C)) and search engines:
rel="nofollow"       
For telling robots that though you are linking a webpage but you don't  trust it or recommend it as a quality publishing website.
rel="external nofollow"
This has exact similar meaning as that of nofollow attribute but the word external tells robot that the linking is pointing outwards. In most SEO forums, its also discussed that it has the same effect as that of target="_blank". Target blank is an HTML attribute that opens a link in new window and external nofollow does the same. But  this is not true because if you click any comment link on this blog or any other wordpress blog using "external nofollow", you will observe that the link opens in the same tab. What I understand is that the difference between nofollow and "external nofollow" is that they both have the same effect but "external nofollow" is a better approach to use when the link is pointing out-words i.e Should be added to outgoing links you don't trust.

Touch Me Share Widget for Blogs and Websites

advancement and development of Social Media and growing interest of people in social networking sites has given birth to dozens of social sharing tools and services. Web masters are getting addicted to these tools because unlike organic traffic from search engines,

web traffic from social channels have overtaken search traffic. Bloggers today depend largely on networks like Facebook, Google plus and twitter to drive traffic to their blogs. These tools are good only if they can attract a visitor to bookmark and share your content. From your website quality content till your blog design, every single bit counts in turning a visitor into a follower. To help you with your dream of increasing  fans and readers we bring you "Touch Me". Its named such due to its appealing look that forces a visitor to roll hover the cursor over the icons and hit follow! :) This gadget is neatly structured using buttons from popular services like Google Plus, Facebook, Twitter and RSS. We have coded it neatly using basic HTML and some spicy CSS styles.

Demo : Click here

Please take less than a minute to like and bookmark this page as a token of favor for our small effort. :)

Where should you add it?

Its is standard practice to add social counters inside posts and social sharing buttons in a sidebar. I would therefore advise that you add this widget towards the top right section of your blog above all ads and gadgets.
Read my article on How to force a visitor to subscribe in order to understand why this location is the best.

Add it to blogger

I am sharing below the steps for BlogSpot users. If you are a wordpress or Joomla user or running a normal website then you just need to copy and paste the following code inside your templates.
Following are the steps for blogger users
  1. Go To Blogger > Layout
  2. Choose add a gadget
  3. Select HTML/JavaScript
  4. Paste the following code inside it,
<style>
/*--------Touch Me Sharing Widget ------*/
.touchme a {
display:block;
height:50px;
width:50px;
padding:0 4px;
float:left;
background:transparent url( https://blogger.googleusercontent.com/img/b/R29vZ2xl/AVvXsEiBTdxgIyG2CKXayKm0mjH2pOwyzsBIt3ODizttEQV-hlWiDYUJ2IpvNphB7DroezeEgXSwZf8w28wARUN5PGSowL0hcnK9V1V1j4d6DWjKg1XO-UN8azu2NMF-RnZkVGIM6f2jODhWN4DD/s1600/Sharing+Touch+Me.png) no-repeat;
-webkit-transition: ease-in 0.2s all;   
-moz-transition: ease-in 0.2s all;   
-o-transition: ease-in 0.2s all;   
-ms-transition: ease-in 0.2s all;   
transition: ease-in 0.2s all;
cursor:pointer;
}

.touchme a.googleplus {
background-position: 0px -58px;
}
.touchme a.googleplus:hover {
background-position: 0px 0px;
}

.touchme a.twitter {
background-position: 0px -290px;
}
.touchme a.twitter:hover {
background-position: 0px -232px;
}
.touchme a.facebook {
background-position: 0px -406px;
}
.touchme a.facebook:hover {
background-position: 0px -348px;
}

.touchme a.rss {
background-position: 0px -174px;
}
.touchme a.rss:hover {
background-position: 0px -116px;
}

</style>

<div class='touchme'>
<!--RSS-->
<a class='rss' href="YOUR RSS LINK" rel='external nofollow' target='_blank'></a>
<!--Google Plus-->
<a class='googleplus' href="YOUR GOOGLE PROFILE LINK" rel='external nofollow' target='_blank'></a>
<!--Facebook-->
<a class='facebook' href="YOUR FACEBOOK LINK" rel='external nofollow' target='_blank'></a>
<!-- Twitter -->
<a class='twitter' href="YOUR TWITTER LINK" rel='external nofollow' target='_blank' ></a>

</div>
Please fill these requirements:
  • Replace YOUR RSS LINK with your Feed burner link.
  • Replace YOUR GOOGLE PROFILE LINK with your Google+ URL
  • Replace YOUR FACEBOOK LINK with your Facebook URL
  • Replace YOUR TWITTER LINK with your Twitter Profile URL
         5. Hit save and you are all done!
Visit your blog to see it working just perfectly. Move your cursor over the icons and enjoy playing!

Credits

The icons used in the widget are designed by Umar Irshad from  Design Kindle. You are requested to link back to this page if you wish to share this gadget with your audience.

Make 10 Changes to Your AdWords Search Campaign that will Boost Your CTR

google adwords
Have the text ads in your AdWords campaigns got to a point where they need a click-through rate (CTR) boost without you making any immediate changes to your CPC bids? You know that increasing your text ads Click Through Rate (CTR) would not only lead to increased traffic, but would ultimately result in improved Quality Scores and a higher Ad Rank.
You might also not want to adjust your CPC bids to improve CTR – so what options are available to you to increase your text ads Click Through Rate CTR without making adjustments to your keywords or CPC bids?
Here are 10 changes you can apply to your campaigns that are sure to improve your Click Through Rate (CTR):

#1 Add a Registered Trademark or Trademark Symbol (™) ®

A trademark can be surprisingly easy to acquire – it is a word, phrase, symbol or design that uniquely identifies your brand or product. In the U.S. you can apply for a trademark through the U.S. Patent and Trademark Office (USPTO) and in the UK through the Intellectual Property Office. A registered trademark allows your business to use the symbol ® along with the mention of the word, phrase or design you have registered – did you know that you are also allowed to use the ™ symbol even if you if it not officially registered or your trademark application is in progress? The impact of an ™ or ® in the title area of your text ads (especially in highly competitive search results) creates a sense of authority and command which ultimately attracts more clicks to your text ads.
What is more interesting is that Google AdWords allows advertisers use third party ™ or ® symbols if the owner of the trademark grants permission – this permission is usually default as many trademark owners require the use of the ™ or ® symbols in print advertising after-all.
PPC Ad Trademark
Have a look at good use of the trademark symbol in the text ads above.

#2 Sitelinks Extensions

Ad Sitelinks apply to ads in the top positions (usually when your text ads make it to the top 3 positions above the organic search area). They include the main landing page associated with the text ad as well as a series of either 3, 4 or 6 text links. The character limit for each text link is 35 characters and 1024 characters for your destination URL.
PPC Ad Sitelinks
Ensure your site links are part of your arsenal for attracting more clicks for your campaigns. Also be sure to link each text link to be most relevant landing page possible. The final tip for your text links are their descriptions – ensure they compliment, up-sell or cross-sell the offer on your main text ad. You could get away with lower CPC if your text links are themed with higher value keywords as an example if a text ad selling ‘lights for mountain bikes’ and has sitelinks linking to their ‘mountain bikes’ landing page (which are higher value items that cross-sell the main offer) low CPC traffic targeted to ‘bike lights’ could be driven to the ‘mountain bike’ section of the site. You could even use your company’s phone number or a special offer as a site link. The challenge is to try to be as creative as possible with 35 characters allocated to you in sitelinks text links.

#3 Use a Business Image or Icon with Your Location Extension

PPC Location Extension
When setting up your Location Extension – be sure to add a ‘business image’ or icon which could be your logo or relevant image to your business. The guidelines are either 125×125 pixels for images, or 16×16 pixels for custom icons in .JPG, .GIF or .PNG formats. Although I have yet to see text ads with business images or icons, I would certainly advice that you add them to your location extension in the event that Google starts displaying your business image or icon in it’s search results.

#4 Use AdWords Product Ads: Product Extensions & Product Listing Ads

PPC Product Extensions
If you already have a Google Merchant Center account for your eCommerce site ensure you connect your AdWords campaign to it using the AdWords Product extensions. I find product extensions to be very useful in improving Click-through-rates of campaigns because they add a visual layer to the display of your ads on Google’s predominantly text based search results. Product extensions are an essential AdWords feature to use for any campaign (with an associated Google Merchant account) selling products related to the keywords the campaign is targeting. The key to optimising product extensions lies in an optimally structured merchant account somewhat identical in structure to your AdWords campaign.
An alternative to Product Extensions is Product Listing Ads - they display product listings from your Google merchant feed but rather than use keyword or ad text from your campaign, solely use content of your product-feeds to automatically match search queries as it deems fit. It is very similar to Dynamic search ads but applies only to products in your Google Merchant Center account (working on autopilot). Google claims that searchers are twice likely to click on a Product Listing Ads than on standard text ads – so what are you waiting for?!?

#5. Google+ Social Extensions

Whether you love or hate Google +1 it is here to stay and having the social extension does make a difference to your text ads because it adds an element of social proof and an endorsement. I am assuming you already have a Google+ Business page (if you don’t follow these steps); hop unto the “Ad Extensions” tab in your campaign and then add a new social extension. Add you Google+ business page in the Google+ URL text box and then link your website back to your Google+ business page using these instructions. SEOmoz have written an excellent post how to connect your Google+ page to AdWords social extension and testify to the fact that it does indeed increase CTR. If you have or are building quite a following on Google+ then you would certainly get a CTR boost. As most AdWords advertisers have yet to take up social extensions, there is still quite a lot of opportunity to get into this space before your competition does. Also consider investing into getting more followers on your Google+ business pages.

#6 Reviews – Rich snippets Reviews & Google Places Reviews

Reviews are a definite route to acquiring credibility and attracting more clicks in Google’s ever competitive paid search space. Getting reviews to display on your product and text ads can be acquired from three main sources: the first and more popular option is via rich snippets reviews, the second source is through the Product Search Seller Rating extension and the last and more recent option is via reviews from your Google Places profile page (which is currently only available from AdWords express account but highly likely to be included in AdWords).
Schema.org offers the widest range of support for rich snippet review rating tags. Other markup formats supported by rich snippets are Microdata, Microformat and RDFa. A final point to note is that your rich snippet reviews can either be displayed as individual or aggregated reviews – aggregated reviews work best with AdWords text ads.
AdWords Product Search Seller rating extensions applies to advertisers that sell goods or services through their website; who have had a minimum of 30 reviews with aggregated ratings of at least 4 stars from Google Checkout or other 3rd party sites that offer customer review snippets. Advertiser have no real control over the display of reviews with the seller rating extension.
Google Places reviews currently only display on AdWords express campaigns – but this might be change very soon to include AdWords accounts.

#7 Offers Extension (currently on limited release beta)

PPC Offer Extensions
With Google’s foray into the group buying space (via Google Offers), it has not taken too long for Google to figure out how to integrate offers with AdWords. Currently in ‘limited release’ status, the Offers extension allows advertisers extend their Google search ads with redeemable online and in-store coupons and discounts offers. As soon as it gets out of beta, it is would definitely increase CTRs of early adopter campaigns. Other than higher CTRs it would offer advertisers, it is set to add an extra layer of customer engagement with customers looking for unique deals via search. Read this detailed post on how to set up Google Offers.

#8 Hyper Descriptive Display URLs

Increase your Click through Rate (CTR) by writing hyper descriptive display URLs with the 35 character limit. Experiment CTRs by using identical headlines and ad descriptions and then varying display URLs. Get more space from display URLs by eliminating the ‘www./ prefix and just opt for:
yourdomain.com/descriptive-text
OR
descriptive-text.yourdomain.com
You could even make use of dynamic keyword insertion {keyword:default text} in this format:
yourdomain.com/{keyword:your-descriptive-text}

#9 Invest in Brand Name Keywords + Sitelinks Extension

PPC Brand Name Sitelinks
By embarking on a strategy that combines aggressively bidding for your competitors & your brand name keywords and by using the sitelinks extension, you would offer searchers more options to click through to high value pages for a significantly lower CPC.
Brand name keywords tend to have much lower CPCs as compared to commercial mainstream keywords – with the sitelinks extension, advertisers have a choice of 6 additional landing pages to associate with the brand name. Advertisers should not only carefully select the associated landing pages but must also use highly descriptive sitelink text.

#10 Improve Your Ad Copy – focus benefits (address: passions, problems & fears of searchers)

Finally – always think about your text ads. Be as creative as possible – tap into rekindling the passions of searchers through killer text ads.
Work on solving potential problems of searchers.
Help searcher overcome their fears with inspirational text ads.
To do the above, you would need to get into the psyche of a potential customer or searcher and role-play to better understand their search intent.
The content of your text ads make a huge difference – never embark on writing text ads without looking at the message of other competing text ads – aim at improving on the message on other competing text ads.